5 Tips for Picking WordPress Plugins

How do you pick the perfect WordPress Plugin for your website?

There are over 55,000 Plugins in the official WordPress open source repository. And that does not include the tens of thousands of paid commercial Plugins available in the marketplace.

Here are 5 Tips to Pick a Plugin

  1. Open Source Software
    WordPress.org Plugins must adhere to a strict set of guidelines, including a GPL-compatible license. These guidelines include privacy, security and other requirements to help protect your site. And all WordPress.org Plugin code is vetted as part of this process.
  2. Active Installations
    Generally, the more installations have been downloaded and activated – the more likely the Plugin is reliable. More activations means more user testing across a wide variety of installations.
  3. Plugin Developer(s)
    A developer who has released multiple Plugins is another sign of confidence because that person likely has more WordPress experience. A team of Plugin contributors can also be a sign of well-tested code quality. For example, I generally trust most Plugins supported by Automattic, WordPress core contributors.
  4. Reviews
    A Plugin with a high volume of quality reviews is a testament to its effectiveness.
  5. Testing and Technical Discovery
    When evaluating Plugins, I often compare the file download size because performance is as important to me as rich features. By comparison, a similarly functioning Plugin with a significantly larger size can be an indication of code bloat and possible issues, including performance or security.

5 Reasons to Avoid Paid Commercial WordPress Themes

Not everyone has the resources for a custom WordPress Theme. And that’s ok. Template Themes are available to fill those needs. But there’s a huge disparity in code quality between template themes. Since 2010, I’ve had the (mis)fortune to help many clients manage their paid commercial Themes.

Here are 5 reasons you may want to reconsider using a third-party paid commercial theme.

  1. Usability
    Now, some clients do find commercial themes easy to manage and edit. However, in my experience, most clients find the editing process cumbersome. I recall a Seattle nonprofit client who was unable to edit their own homepage because their Theme had too many confusing Theme Customizer options. Other Themes require you to learn various third-party editing tools, like Visual Composer or Elementor, which can take hours to learn and days to master.
  2. Performance
    Due to the feature bloat inherit with most commercial themes, page load speed is often subpar – well over the benchmark 2 – 3 second load time. I’ve seen page sizes exceed 10 Mb with almost 200 web server requests (e.g. CSS files + fonts + images + javascript) – when 40 – 60 is ideal for an optimized database-driven website.
  3. Portability
    Commercial Themes often bundle lots of features – like content sliders, e-commerce, fonts, icons, and more. You should generally rely on your Theme for visual layout and styles; and rely on Plugins for features. When features are integrated into a Theme, content may not easily port over to a new Theme, if and when you decide to switch.
  4. Security
    Security consistently ranks last among client priorities. Until your site is hacked and goes offline. The stability of any WordPress site strongly depends on the choice of Theme and Plugins. WordPress.org-approved themes are vetted by a volunteer Theme Review Team that ensures themes in the official WordPress repository conform to certain coding standards.
  5. Accessibility
    Most people don’t think about inclusion when they manage their own web project. But most premium themes do not follow to accessibility guidelines, much less comply with WCAG AA standards required for organizations that must meet federal ADA regulations.

Considering Vimeo For Your Business? 5 Talking Points Worth Thinking About Youtube vs. Vimeo?

By: Brandon Sisino, Sisino Photography 

Youtube vs. Vimeo

When would I choose YouTube? When I’m looking for my work to be part of the second largest search engine (YouTube.com) and I need more control over the delivery/sharing options of my video. If neither of these items trigger any additional questions, I’d probably just go for the YouTube platform.

Vimeo plans

Control Where Your Videos Are Embedded

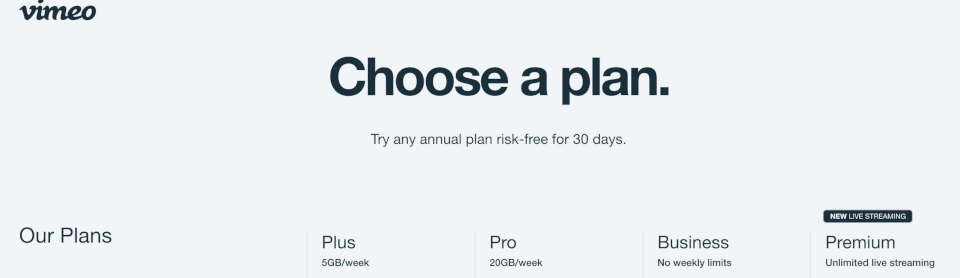
Vimeo’s Basic Plan ($8 a month at the time of writing) includes the ability to control which domain your video is embedded, basic analytics (which you also get with YouTube) about your video and the ability to customize your video player. All “basic” items that YouTube can compete with. However the basic plan can help you deliver an experience on your website that isn’t so cookie cutter looking as other sites. Use the basic analytics to make decisions about improving your content. By controlling the domain(s) where your video is allowed to be hosted, you’ll have some peace of mind a random blogger hasn’t embedded your video on their own site.

Transferring Large Video Files

File transfers. The Basic plan also includes the ability to share video and allow someone to download the original file. For my workflow it’s nice to know I can upload at 4k and the client’s download will be in 4k. This one feature alone could be worth the decision to start with Vimeo.

Speaking of transferring files. Save yourself from having to upload multiple files if you want to share on YouTube or Facebook. Publish directly from your Vimeo video page with consolidated analytics.

vimeo

Working With Teams and Priority Support

If your business relies heavily on video, the Basic plan probably doesn’t offer enough benefits to improve your workflow. Stepping up to the Pro Plan ($20 a month at the time of this writing) offers more features. From creating team projects, sending review links so a client can add comments to the video, customizable options for the embedded player, and priority support. I’m all for free or cheap platforms – but if I’m working on something for a client or my own business I don’t want to spend my own time reading through knowledge base articles or random help pages to fix a problem.

Since I’ve mentioned the upgraded plan, I’ll also point out if you want to sell your videos online, you’ll need to sign up for at least the Pro Plan.

No Advertising

With online advertising finding its way into everywhere we look, Vimeo has promised:

“Your work will never be tarnished by in-video ads. That’s right — no pre-roll, post-roll, or overlays. On Vimeo, you can present your work in exactly the way you want.”

That is a pretty bold statement but if you’re a business trying to tell a brand story or sell a service/product the last you want is for a potential client/customer to have to see an advertisement for something else. I look at it like this – maybe you’ve paid for Adwords so a prospective customer make it to your website, which you also probably paid for; you’ve developed an attractive, user friendly page that has the viewer interested; and now the first thing they see is an ad delivered through your Youtube channel for a product that has nothing to do with your business. Grrr.

vimeo services

Vimeo Is For Professionals

Consider the user base by platform. Vimeo has traditionally been made up of professional video/cinema creators. Youtube has become more of a collective space for internet culture. If you are trying to deliver a professional message it may align better by being hosting on a more professional-oriented platform.

With the upgraded plans as a business you can also add email capture and calls-to-action at the end of a video to encourage your viewer to follow on social, shop now or visit another website page to learn more.

If you’re a freelancer on an upgraded account you can even mark your account as “for hire” to help generate new business opportunities.

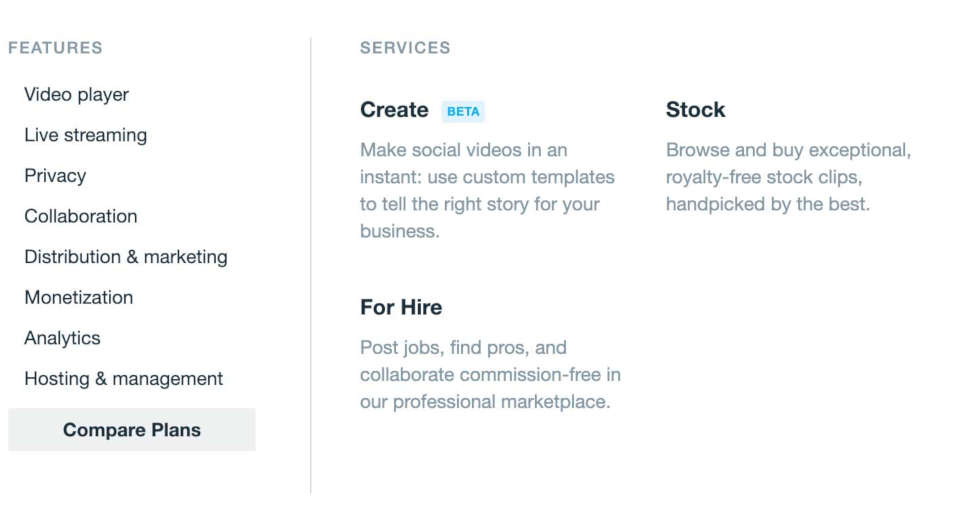
More recently Vimeo has launched “Create” which allows users to create social friendly videos from your existing content (check with your photo/video creator to ensure you can repurpose content without voiding any licence agreements).

There is always Youtube

Of course, there is still YouTube. It’s free to use and it does offer some content distribution tools if they fit your needs. As I mentioned prior it has much higher viewership and is a great way to increase your search ability on the web. It may make sense to create a YouTube edit and an edit that will be hosted on your website.

If you’ve ever noticed at the end of a video you’ve watched on YouTube a list of suggested videos will pop up at the conclusion of the video. Often they are not related to your own brand. One way to help avoid this is to ensure your videos on YouTube are part of a custom playlist. This can help ensure the next video is one of your own or at least something you recommend/endorse.

Brandon is a Freelancer based in Seattle, WA. He spent a year creating photo and video content for the online mountain bike school www.snamtb.com (all hosted on Vimeo Pro Account) and currently runs his own photography business

Questions? Comments? Email: brandon@sisinophotography.com 

5 Ways to Optimize Image File Sizes for Web Use

To maximize visitor engagement and conversions, your page needs to load in less than 2-3 seconds. And since so much visitor traffic now originates from cell phones, often on lower bandwidth 3G connections, it’s important to optimize your images.

In 2018, the median website page size was approximately 2.1 Mb. And the average page size was much higher.

Here are 5 ways to reduce image file sizes to reduce your page size and improve your page load speed:

  1. TinyPNG
    TinyPNG is a web-based tool that uses lossy compression techniques to reduce the file size of your PNG files. By selectively decreasing the number of colors in the image, fewer bytes are required to store the data. The effect is nearly invisible but it makes a very large difference in file size, with size reductions up to 70% or more.
    Remember: PNG file formats are best used for logos, line art, and icons with transparency; photographs should generally be saved as compressed JPGs.
  2. Adobe Photoshop, Elements
    Graphics editing software allows you to custom crop and/or scale images to their actual visible dimensions. Plus, these tools provide a ‘Save For Web’ or Export option that allows you to reduce file sizes for web use thru compression. A compression (‘quality’) setting of 50%-60% of the original image is often sufficient to reduce file size and retain image quality. An advantage of using these tools is that you can also perform color and lighting corrections.
    If your organization cannot afford Photoshop, Elements provides most basic image editing tools; GIMP is a cross-platform open source alternative available for free.
  3. File Explorer (Windows)
    This is a quick method that allows you to send images at smaller dimensions. Right click any image and select “Send To: Mail recipient.” A window should be generated giving you the ability to send the image(s) from Smaller sizes (640 x 480 pixels) up to Large size (up to 1280 x 1024). With the exception of full width or super wide panorama header images, most images on your website should not need to be wider than 1,280 pixels.
  4. Cell phone
    If the images are accessible on your cell phone, both iPhones and Android give you options to ‘Reduce image size’ when forwarding images.
  5. WordPress
    When you upload an image to your Media Library, by default, WordPress creates 3 physically different, proportional versions of your image: thumbnail, medium, and large sizes. (These default image dimensions need to be adjusted to coordinate with your theme layout) Be careful inserting full-size images into your website.
    You can further reduce image sizes with WordPress Plugins – such as EWWW Image Optimizer, Smush, TinyPNG. My favorite web host, SiteGround, even includes an image optimization option with its SG Optimizer performance Plugin.
    And, if your WordPress Theme supports it, WordPress 4.4 added native responsive image support by including srcset and sizes attributes to the image markup it generates. Browsers can now choose to download the most appropriate size and ignore the others — potentially saving bandwidth and speeding up page load times in the process.
    UPDATE: WordPress 5.3 introduced a native feature that limits the maximum dimension of uploads to 2,560 pixels.